You can make a rich latte without an espresso machine by brewing strong coffee using a French press or Moka pot with dark roast beans. Heat milk gently to 150-160°F, then froth it using a jar, whisk, or French press for creamy, velvety foam.
Pour the milk slowly over coffee, controlling the flow for a smooth blend and delicate layers. Master these simple steps, and you’ll soon create café-quality lattes right at home with ease and flair. It’s easier than you might think!
Basic Latte Recipe Without an Espresso Machine

Although you don’t have an espresso machine, you can still craft a rich, satisfying latte by brewing a strong coffee using a French press, Moka pot, Aeropress, or Nespresso.
Once your coffee is ready, heat milk to about 150-160°F either in the microwave or on the stovetop until steaming.
To froth, shake or whisk the heated milk vigorously in a jar, French press, or use a handheld frother until it doubles in volume and becomes frothy.
Pour your strong coffee into a mug, then gently add the frothed milk. Hold back the foam with a spoon if you prefer less froth.
Finish by spooning or pouring the milk foam on top. Feel free to add flavorings like vanilla or cinnamon for a personal touch.
It’s easier than you might think to make a latte that hits the spot without fancy equipment! Remember to heat the milk to the optimal temperature to preserve milk texture and flavor for the best frothing results.
How to Brew Strong Coffee for Your Latte

To make a great latte without an espresso machine, you’ll want to start by brewing some strong coffee. You can use methods like a French press, Moka pot, or Aeropress—just aim for a 15:1 water-to-coffee ratio.
It’s best to pick dark roast or espresso beans since they really boost the flavor’s richness and intensity.
And if you want your brew to be even bolder, try using less water or more coffee. That way, you’ll get a strong, flavorful base perfect for your latte.
Keep in mind that roast profiles influence extraction time and flavor, with dark roasts generally requiring shorter brewing times to preserve their bold characteristics.
Coffee Brewing Methods
When you want to craft a latte without an espresso machine, brewing strong, concentrated coffee becomes essential. You can use a French press, Moka pot, Aeropress, or Nespresso to achieve a robust base with a 15:1 water-to-coffee ratio. Each method offers a unique way to extract bold flavors, especially when you choose dark roast or espresso beans.
Instant espresso or heavily brewed instant coffee also works well for convenience.
| Brewing Method | Key Feature |
|---|---|
| French Press | Full-bodied, rich flavor |
| Moka Pot | Italian-style, intense brew |
| Aeropress | Quick, concentrated coffee |
| Instant Espresso | Fast, convenient option |
Pick the method that fits your equipment and time, making sure you get a strong coffee foundation for your latte. Proper brewing techniques are crucial to maximize flavor extraction and balance in your homemade latte.
Bean Selection Tips
Since the foundation of a great latte lies in the coffee’s strength and flavor, selecting the right beans is critical. To brew a strong coffee base without an espresso machine, focus on these key tips:
- Choose dark roast or espresso beans. Their richer, bolder flavor forms the perfect latte base.
- Grind your beans finely. This boosts extraction and strength, especially with French press or Moka pot brewing.
- Maintain a water-to-coffee ratio near 15:1. This concentrates your brew, making it espresso-like in intensity.
If you’re short on time, strongly brewed instant espresso also works well. For the best flavor and crema, use freshly ground beans and high-quality espresso techniques even when brewing without a machine.
Concentration Ratios
Although you don’t have an espresso machine, you can still craft a strong, concentrated coffee base by mastering the right water-to-coffee ratio, around 15:1 is ideal. This balance guarantees your coffee stays bold without becoming bitter.
Use dark roast or espresso beans to deepen the flavor profile.
Brewing methods like a French press, stovetop Moka pot, Aeropress, or even a Nespresso machine can help you achieve this concentration.
If you’re short on time, heavily brewed instant coffee or instant espresso works as a quick alternative.
To boost strength, reduce the water volume or increase the coffee grounds, but avoid over-extraction.
With these adjustments, you’ll create a rich, flavorful coffee base perfect for your homemade latte.
For best flavor, use freshly roasted beans stored airtight and used within one month.
How to Froth Milk for Latte Without Special Tools
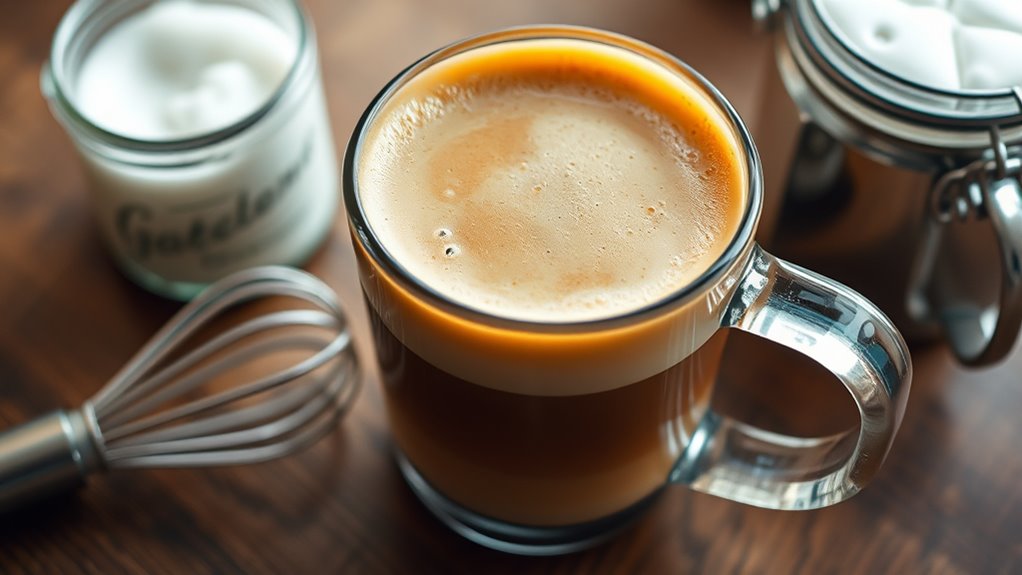
If you don’t have a fancy espresso machine, you can still get creamy, frothy milk for your latte using simple household items. Start with cold milk because it makes denser foam. Then heat it to about 150-160°F before frothing.
Here are three easy methods you can try:
- Pour warm milk into a tightly sealed jar and shake it vigorously for 30-45 seconds. Open carefully to release the pressure, then pour the frothy milk over your coffee.
- Use a handheld frother or whisk to briskly aerate warm milk until it’s velvety and foamy.
- If you have a French press, add warm milk and pump the plunger up and down until thick foam forms.
These techniques will give you rich, creamy foam without any special tools. It’s pretty simple and totally worth trying! Remember, maintaining temperature stability during milk heating can help achieve the best texture and flavor.
Simple Hacks to Improve Latte Foam and Texture
When you want to elevate your latte foam, focusing on the texture and bubble size makes all the difference. Heat your milk until just steaming. This helps create denser, more consistent foam.
Elevate your latte foam by heating milk until steaming for denser, more consistent texture and smaller bubbles.
Then, shake it vigorously in a mason jar or cocktail shaker for 30 to 45 seconds to generate dense, velvety bubbles. Alternatively, use a handheld frother or small whisk to rapidly aerate the warm milk, producing fine, stable foam that’s perfect for latte art.
If you don’t have those tools, pumping a French press plunger up and down with warm milk for 20 to 30 seconds also works well to create thick, creamy foam.
By incorporating smaller bubbles through these methods, your latte foam will be smoother and longer-lasting.
This really enhances both texture and mouthfeel, making every sip even better.
For a quick espresso-style base to pair with your frothed milk, consider using a Keurig with dark roast pods to get richer, bolder coffee flavors that complement your latte foam.
How to Assemble Your Latte for Best Flavor and Texture
To get the best flavor and texture from your latte, start by pouring your brewed strong coffee or espresso into a wide-mouthed mug. This creates a stable base that supports both the milk and foam.
Next, follow these key steps to assemble your latte perfectly:
- Use a spoon to hold back the foam as you pour heated, frothed milk into the mug’s side at a steady pace. This ensures smooth blending with the coffee and a natural swirl.
- Gently swirl the mug to integrate the milk and coffee evenly, balancing flavor and texture.
- Finish by topping your latte with a spoonful of foam or a sprinkle of cinnamon or cocoa powder for an appealing, professional touch.
Since espresso has a rich, velvety texture and concentrated flavor, it serves as an ideal base for lattes.
Barista Tips for Pouring Smooth Latte Milk Foam
To pour smooth latte milk foam, start by pouring slowly from a higher height. This helps create a natural swirl in the coffee.
Then, lower the pitcher to control the flow better.
Try to keep your pour steady and consistent. This way, the milk blends evenly with the coffee, forming a creamy, velvety texture.
With a bit of practice, you’ll get the hang of the precise movements needed.
Soon enough, you’ll be creating clean, professional-looking foam and latte art like a pro.
Controlling the flow rate during pouring is key to achieving the ideal texture and integration of milk and espresso.
Pouring Techniques Explained
Although pouring milk might seem straightforward, mastering the technique is essential for creating smooth, velvety latte foam that enhances both texture and appearance. To pour like a pro, follow these key steps:
Start pouring slowly from a higher height into the center of your espresso. This creates a controlled, smooth flow that blends the milk evenly.
Tilt your mug slightly to encourage the milk to swirl naturally, setting the stage for a beautiful latte art pattern.
As the cup fills, bring the spout closer to the surface and use a steady, gentle stream.
Finish with a quick flicking motion to add contrast between milk and foam, perfect for decorative designs.
This approach guarantees silky layers and a visually appealing latte every time.
Give it a try, and you’ll see the difference in both taste and presentation!
For an added flavor depth, consider incorporating a small amount of espresso powder to subtly enhance your latte’s richness.
Achieving Creamy Foam
Mastering pouring techniques sets the foundation, but achieving that perfect creamy foam truly elevates your latte.
Start with cold, whole milk for the best stability and velvety texture. Heat it gently, then shake vigorously in a sealed mason jar or cocktail shaker for 30-45 seconds to create smooth, creamy foam.
Tap the jar on a hard surface and swirl the milk to break larger bubbles, refining the foam’s consistency.
When pouring, angle the frothed milk into your espresso or strong coffee, swirling gently to integrate the foam seamlessly.
For a professional finish, use a spoon to hold back the foam initially, pouring the liquid milk first, then spoon the foam on top.
This technique delivers a balanced, luscious latte every time.
Common Mistakes to Avoid When Making Lattes at Home
When you skip using strong, concentrated coffee and opt for a weak brew instead, your latte will lack that rich, authentic flavor you’re aiming for. Avoid these common mistakes to perfect your homemade latte:
- Overheating Milk: Keep milk under 160°F to prevent scorching and a burnt taste that ruins smoothness.
- Poor Foam Technique: Always tap and swirl your frothed milk before pouring to break up large bubbles and create velvety foam.
- Incorrect Pouring: Pour milk slowly and close to the cup to maintain clean layers and avoid disturbing the coffee base.
Also, release pressure carefully when opening any shaken container to prevent hot spills.
Following these steps ensures your latte tastes as great as it looks.
Frequently Asked Questions
Can I Use Non-Dairy Milk for Making Lattes Without an Espresso Machine?
Yes, you can use non-dairy milk like oat or soy for lattes without an espresso machine. Just heat it to 150-160°F and froth it well.
Try experimenting with different brands to find the creamiest, most stable foam. It’s all about what works best for you!
How Long Can I Store Frothed Milk Before It Loses Texture?
Frothed milk is like a fleeting cloud. You’ll want to use it within 10-15 minutes for the best texture.
If you refrigerate it, it can last up to 24 hours. But keep in mind, the foam will deflate and separate over time. So, it won’t be as nice and frothy after a while.
What Type of Coffee Grind Works Best for Strong Brewed Coffee?
You’ll want a fine grind for strong coffee with a stovetop espresso maker or Moka pot. For French press, go coarse to avoid bitterness. Choosing the right grind guarantees rich, full-bodied flavor every time you brew.
It really makes a difference in how your coffee tastes. So, don’t be afraid to experiment a little until you find what works best for you. Brewing strong coffee can be simple when you get the grind right!
Can I Add Flavored Syrups to Homemade Lattes Without Espresso?
Yes, you can add flavored syrups to homemade lattes without espresso. Just mix the syrup into your strong brewed coffee or steamed milk for an even, customizable taste.
Make sure to adjust the sweetness carefully so it doesn’t overpower your latte. It’s all about finding the right balance that suits your preference. Feel free to experiment a little!
Is It Possible to Make Iced Lattes Without an Espresso Machine?
Absolutely, you can craft iced lattes without an espresso machine. Think of strong brewed coffee as your espresso’s loyal shadow. Chill it, then top with frothed milk.
This simple ritual delivers creamy, invigorating iced lattes anytime you crave.
Conclusion
Now that you’ve mastered these simple steps, you’re ready to channel your inner barista. No fancy machine needed. Like a modern-day alchemist, you’ve transformed everyday ingredients into a creamy, comforting latte that rivals any café’s.
Remember, patience and practice are your secret ingredients. So, grab your mug, embrace the process, and savor every sip of your homemade masterpiece. Your perfect latte moment is just a brew away.