To make a mocha with your espresso machine, start by pulling a fresh 18-20 gram espresso shot, aiming for 35 ml in 35-40 seconds. Stir in 1–2 teaspoons of quality cocoa or chocolate syrup while the espresso’s hot.
Next, steam milk to silky microfoam at 140-150°F. Then pour it smoothly to blend flavors and create attractive foam art.
Mastering these basics sets you up to explore creative variations and expert techniques for the perfect mocha experience. Give it a try and have fun with it!
How To Prepare Your Espresso Shot For A Mocha

How do you guarantee your espresso shot is perfect for a mocha? Start by purging the espresso machine’s group head to clear residual water and preheat the portafilter.
Next, grind fresh coffee beans to a fine consistency. Aim for 200-300 microns.
Grind fresh coffee beans finely, targeting a particle size between 200 and 300 microns for optimal extraction.
Dose 18-20 grams into the portafilter, then tamp evenly with about 30 pounds of pressure to ensure uniform extraction.
Lock the portafilter securely into the group head and begin extraction. Your goal is a 35-40 second brew time yielding roughly 35 ml of espresso.
Once you reach the desired volume, stop the shot immediately and remove the portafilter to avoid over-extraction, which can cause bitterness.
Following these steps guarantees your espresso provides a rich, balanced base. That’s essential for a perfectly harmonious mocha.
Remember, managing extraction time and coffee dose is crucial for achieving the ideal caffeine content and flavor balance in your espresso.
How To Pick The Best Chocolate For Your Mocha
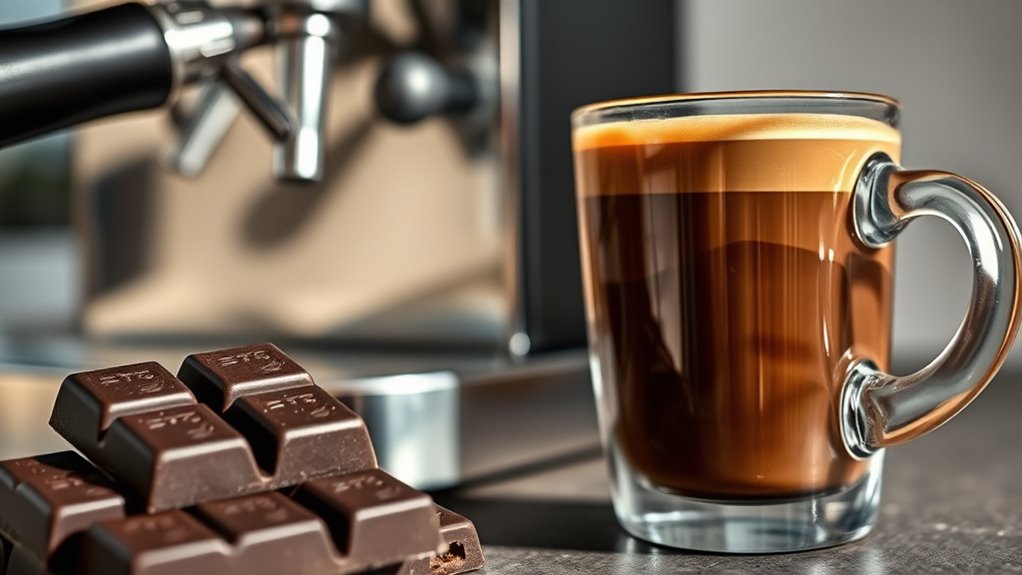
To craft the perfect mocha, you’ll want to compare chocolate types carefully. Think about options like dark chocolate or rich cocoa powder that melt smoothly into your espresso.
And here’s a tip: pairing these chocolates with complementary flavors, such as hazelnut or white chocolate, can really elevate your drink’s complexity.
Choosing the right chocolate isn’t just about sweetness—it’s about balancing richness and texture for a flawless blend.
Also, maintaining your espresso machine by regularly descaling it ensures consistent water temperature and flavor extraction, which is crucial for the best mocha experience.
Chocolate Types Comparison
Although choosing the right chocolate can seem intimidating, understanding the differences between dark, milk, unsweetened cocoa, and chocolate syrup will help you craft the perfect mocha tailored to your taste. Here’s a quick comparison:
- Dark chocolate: Offers a rich, intense flavor that pairs beautifully with espresso. Aim for 60% cocoa or higher for depth.
- Milk chocolate: Sweeter and creamier, ideal if you prefer a milder, smoother mocha.
- Unsweetened cocoa powder: Delivers a pure, bitter chocolate note, perfect for less sweetness and authentic taste.
- Chocolate syrup or melted chocolate: Provides convenience and consistent sweetness, making it easy to blend into your drink.
Pick based on your preferred sweetness, intensity, and texture. Mixing types can also yield a balanced mocha. Keep in mind that the espresso extraction ratio can influence how the chocolate flavors integrate with the coffee’s strength and body.
Flavor Pairing Tips
When selecting chocolate for your mocha, prioritizing quality guarantees the best flavor harmony with your espresso. Choose high-quality cocoa powder or chocolate syrup with a rich, smooth profile to complement the coffee’s intensity.
Dark chocolate with at least 70% cacao offers a bold, slightly bitter edge that balances espresso’s robust flavor.
If you prefer a sweeter, creamier mocha, milk chocolate works beautifully, adding a dessert-like softness.
Experiment with flavored chocolates like hazelnut or mint to introduce exciting aroma and taste layers.
Make sure your chocolate melts easily and blends seamlessly with hot espresso, ensuring a velvety, cohesive drink.
With these tips, you’ll craft a mocha that perfectly matches your flavor preferences and elevates your espresso experience.
Because espresso is brewed under high pressure, the extraction enhances the richness and aroma of the chocolate-coffee combination.
How To Combine Espresso And Chocolate For Rich Flavor

Since the key to a rich mocha lies in the seamless fusion of espresso and chocolate, you’ll want to start with freshly brewed, hot espresso. This guarantees the chocolate melts perfectly, allowing flavors to meld deeply. Follow these steps:
- Add 1–2 teaspoons of high-quality drinking chocolate or cocoa powder directly into the hot espresso. Stir vigorously until the chocolate fully dissolves, creating a smooth, chocolate-infused base.
- For a more intense flavor, incorporate a small amount of chocolate syrup before mixing.
- Combine espresso and chocolate immediately after brewing to preserve temperature and maximize flavor integration. This way, you get the best taste every time.
It’s all about keeping things fresh and hot for that rich mocha experience. Maintaining the optimal extraction time during brewing ensures your espresso has balanced flavor and crema, which enhances the mocha’s richness.
How To Steam And Texture Milk Perfectly For Your Mocha
Mastering the art of steaming and texturing milk is essential to crafting the perfect mocha. It transforms plain milk into a creamy, velvety complement to your rich espresso and chocolate blend.
Steaming milk perfectly creates a creamy, velvety harmony with rich espresso and chocolate.
Start by holding the milk pitcher at an angle and inserting the steam wand just below the surface to introduce microfoam. Turn on the steam and position the wand to create a whirlpool effect, swirling the milk evenly for smooth texture and heat.
Steam until the milk reaches 140-150°F (60-65°C). Avoid overheating to prevent a burnt taste.
After steaming, tilt the pitcher slightly and swirl gently to eliminate large bubbles. Then tap it on a surface and swirl again to settle the foam. This will help you achieve a glossy, silky microfoam perfect for your mocha.
For best results, use cold, fresh milk and a properly sized pitcher to ensure optimal microfoam texture and flavor.
How To Pour Milk To Create Beautiful Foam Art
Start by holding the milk pitcher about 3-4cm above your cup. Pour steadily to form the base of your foam art.
As the foam starts to rise, adjust the pouring angle and speed. This helps you shape distinct patterns like hearts or rosettas.
Once you get the hang of these techniques, you’ll be able to control contrast and detail, turning your mocha into a real visual delight.
For the best flavor, ensure your espresso is extracted at a stable brew temperature to complement your milk foam perfectly.
Milk Steaming Techniques
Creating beautiful foam art begins with steaming your milk correctly to achieve the perfect microfoam. Mastering this step guarantees your mocha not only tastes great but looks stunning. Follow these key techniques:
- Hold the milk jug at a 45-degree angle and position the steam wand just below the surface to introduce air and create fine, velvety bubbles.
- Keep the wand slightly off-center and move the jug in a gentle circular motion for even heat distribution and consistent foam texture.
- Tilt the jug slightly while steaming to help incorporate air evenly and develop glossy, silky microfoam.
- Stop steaming once the milk reaches 140-150°F (60-65°C), wipe the wand clean, then tap the jug to remove larger bubbles.
These steps set the foundation for flawless foam art. Easy, right? Just a bit of practice and you’ll be creating foam like a pro in no time! Understanding how milk temperature influences texture and flavor will help you perfect your steaming technique.
Pouring Angle Tips
Although steaming your milk perfectly sets the stage, how you pour it determines the final look of your foam art. Hold the milk pitcher about 3-4cm above the cup to control pour height and flow.
Begin pouring steadily into the drink’s center, allowing the microfoam to rise and blend smoothly with the espresso.
As foam forms, tilt the pitcher slightly and lower it closer to the surface to direct the milk stream. This helps create the contrast essential for patterns like hearts or rosettas.
Keep your pour slow and consistent to shape the foam effectively.
Finish with a quick, controlled flick or movement, using the angle and speed to define your design’s edges.
Mastering these pouring angles will really elevate your mocha’s presentation with beautiful, precise foam art. Give it a try—you’ll notice the difference!
Remember, since espresso contains a high caffeine concentration, pouring milk smoothly helps balance its strong flavor and stimulant effect.
Foam Art Patterns
When you pour steamed milk into your mocha, the way you control the flow and angle directly shapes the foam art you create. Mastering this technique transforms a simple drink into a visual delight.
Follow these steps to create beautiful foam art patterns:
- Start pouring from a height into the center to let the microfoam settle on top.
- Gradually lower and tilt the pitcher as the cup fills to control foam shape.
- Use the free pouring technique. Move the pitcher side to side or in specific motions to form hearts or rosettas.
- Keep a steady, slow pour with the spout close to the surface to develop contrasting patterns naturally.
Practice timing and angles diligently to achieve precision and symmetrical designs every time. It might take a bit of patience, but once you get the hang of it, your foam art will look amazing every time! Additionally, be mindful of caffeine content when using multiple espresso shots in your mocha, as 4 shots can contain approximately 258 mg of caffeine, which may affect your tolerance.
Mocha Variations And Customizations To Try At Home
If you want to elevate your mocha experience, experimenting with different variations and customizations can make a big difference. Try adding flavored syrups like hazelnut, caramel, or peppermint to introduce unique taste profiles.
Swap out milk chocolate for dark or white chocolate to change the mocha’s richness and sweetness.
Adjust your milk-to-espresso ratio to craft a stronger or milder flavor that suits your palate.
For extra indulgence, top your mocha with whipped cream or drizzle caramel or chocolate syrup for added texture and visual appeal.
If you prefer a healthier option, use plant-based milks such as almond, soy, or oat, and choose sugar-free chocolate.
These simple tweaks let you tailor your mocha perfectly every time. Give them a try and find the combo that hits the spot just right!
How To Clean And Maintain Your Espresso Machine
Keeping your espresso machine clean and well-maintained guarantees every cup tastes fresh and your equipment lasts longer. To maintain your machine in top shape, follow these essential steps:
- Descale regularly using a descaling solution. This helps prevent mineral buildup and keeps your machine performing well.
- Clean the brew group and portafilter after each use. Removing coffee oils and residues is key because they can affect the flavor.
- Wipe down the steam wand and milk frothing parts daily. This stops milk residue buildup and helps avoid bacterial growth.
- Replace water filters periodically as per the manufacturer’s instructions. Doing this ensures good water quality and keeps your machine running efficiently.
Also, don’t forget to clean the drip tray and waste container regularly. This prevents overflow and keeps everything hygienic.
Following this routine will keep your espresso machine running smoothly and make sure your mocha tastes perfect every time.
Frequently Asked Questions
Can I Use Pre-Ground Coffee Instead of Fresh Beans for Mocha?
You can use pre-ground coffee for your mocha, but it won’t be as fresh or flavorful as freshly ground beans.
Make sure to store it airtight and keep it away from heat and light. This helps preserve its best taste when you brew.
Freshness really makes a difference, but pre-ground coffee can still do the job if that’s what you have on hand.
What’s the Ideal Cup Size for Serving a Mocha?
You’ll want an 8 to 12-ounce cup for your mocha. It balances espresso strength and creamy milk perfectly, giving you enough room for foam and toppings without overflowing.
This ensures a rich, satisfying flavor and great presentation. It’s just the right size to enjoy every sip without feeling rushed. Plus, it looks inviting when served.
How Long Can I Store Leftover Mocha in the Refrigerator?
You can store leftover mocha in the refrigerator for up to 24 hours. Make sure it’s in an airtight container. This helps keep it fresh and prevents it from absorbing other odors.
Before you reheat it, give it a good stir. Then, gently warm it up so you don’t lose that delicious flavor or end up with sour milk. Enjoy it fresh for the best taste!
Is It Possible to Make a Mocha Without an Espresso Machine?
Yes, you can make a mocha without an espresso machine by brewing strong coffee with a French press or moka pot. Just mix it with chocolate and steamed milk for a rich, creamy mocha that tastes fantastic at home.
It’s pretty simple once you get the hang of it. Just use good quality coffee and chocolate, and you’re all set. You might even find you prefer it this way!
Can I Substitute Dairy Milk With Plant-Based Alternatives in a Mocha?
Imagine using creamy oat milk in your mocha. It steams well, adds natural sweetness, and creates lovely froth.
You can definitely substitute dairy with plant-based milk. Just choose barista-style versions and heat carefully for the best results.
Conclusion
Now that you know how to prepare your espresso, choose the best chocolate, and combine flavors perfectly, you’re well on your way. Steaming and texturing milk, plus pouring beautiful foam art, will help you craft the ultimate mocha.
Feel free to experiment with variations and customize everything to your taste. Don’t forget to maintain your machine for consistent results.
Brew confidently, savor deeply, and share generously. Making every mocha moment a delicious blend of skill, creativity, and passion is what it’s all about.