To steam milk correctly, start by pouring cold milk and purging your steam wand for hygiene. Position the wand just below the milk surface, slightly off-center, then turn on the steam to introduce controlled air. Keep the temperature between 130-140°F, using a thermometer to avoid scorching.
Finish by swirling and tapping the pitcher for smooth microfoam. Always wipe and purge the wand immediately after. Mastering these steps sets you up for consistent, barista-quality milk every time.
There’s more to perfect your craft ahead.
Preparing Milk and Equipment for Steaming

Before you start steaming, make sure you pour cold milk into your steaming pitcher, filling it just below the spout to avoid overflow.
Next, purge the steam wand for a few seconds to clear any residual milk or debris, ensuring clean, dry steam. This step is essential for consistent texture and hygiene.
Once you’ve poured the milk and prepped the wand, you’re ready to position the wand properly and begin steaming.
After steaming, wipe the steam wand immediately with a damp cloth to prevent milk buildup and maintain your equipment’s longevity.
Taking these preparation steps seriously guarantees smoother steaming and better microfoam quality. It sets you up for a perfect espresso-based drink every time.
Regular maintenance, including wiping and purging the steam wand, is crucial to prevent bacterial growth and ensure hygiene.
Positioning the Steam Wand and Starting to Steam Milk
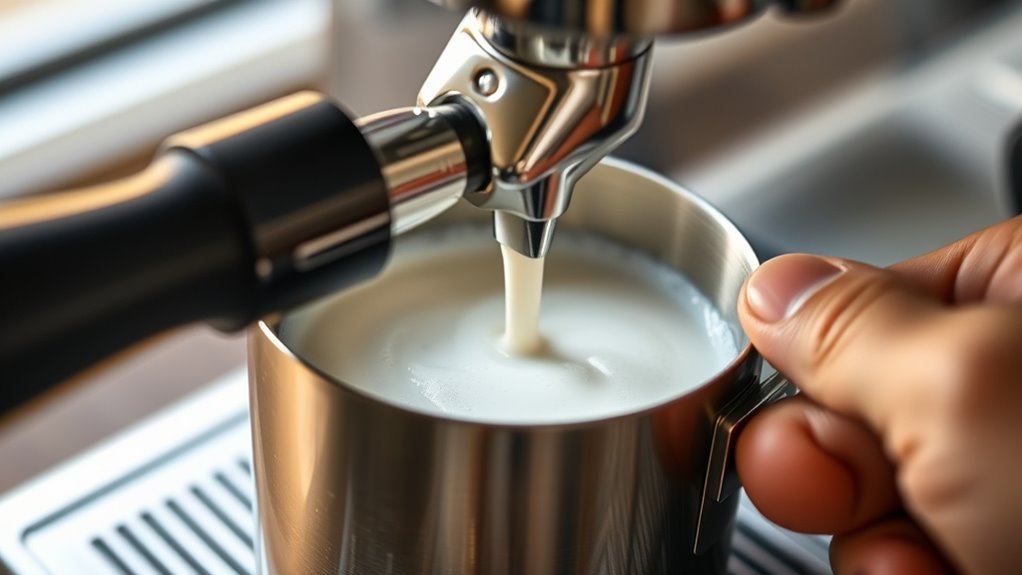
With your milk poured and steam wand purged, it’s time to position the wand correctly to start steaming. Place the steam wand tip just below the milk’s surface, slightly off-center in the pitcher for ideal aeration. Rest the tip against the pitcher’s side to keep it stable and maintain control as you begin.
Turn on the steam wand immediately after positioning to introduce controlled air and start forming microfoam. Keep the tip submerged just beneath the surface to gently aerate the milk without creating excessive foam.
As you steam, adjust the wand’s position as needed to guarantee even heating and consistent microfoam development throughout the process.
Mastering this step sets the foundation for silky, well-textured milk. So take your time and get comfortable with the feel of the milk as it changes texture. You’ll be making barista-quality drinks in no time!
The steam wand operates independently from the brewing process, allowing you to froth milk without interrupting espresso extraction for efficient multitasking.
Steaming Milk and Controlling Temperature for Microfoam
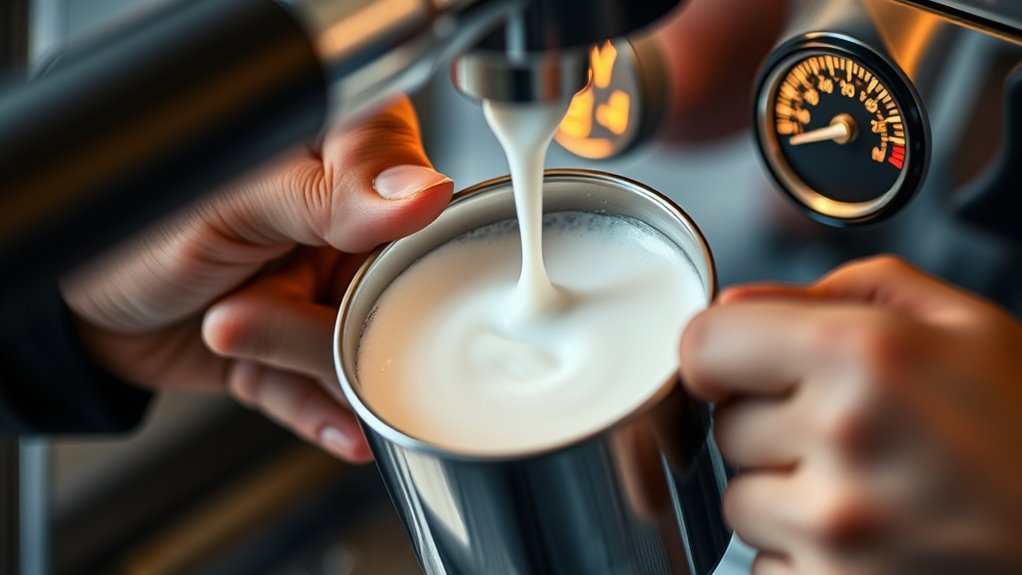
Although steaming milk might seem straightforward, controlling the temperature precisely is vital for achieving rich microfoam and revealing the milk’s natural sweetness.
Keep the milk between 130-135°F for ideal flavor and texture, but never let it exceed 150°F to avoid scalding. Use a thermometer or your hand to monitor heat continuously.
Turn off the steam wand promptly around 140°F to maintain a smooth, velvety consistency. Adjust the steam wand’s position and air intake to create tiny, uniform bubbles. This fine microfoam is essential for beautiful latte art.
Mastering these temperature and texture controls ensures your steamed milk complements espresso perfectly. Proper water temperature between 195°F and 205°F during espresso extraction also supports milk frothing and overall flavor balance.
Finishing Milk Texture and Cleaning Up
Once you’ve steamed the milk to the perfect temperature and texture, swirling it in the pitcher helps create a smooth, glossy microfoam with a velvety finish. Tap the pitcher gently on the counter to pop any surface bubbles, ensuring a uniform consistency. This step is key for that luxurious mouthfeel in your espresso drinks.
Right after steaming, wipe the steam wand with a damp cloth to remove milk residue and prevent buildup. Don’t forget to purge the steam wand by briefly releasing steam to clear any remaining milk inside. It’s essential for hygiene and keeps your equipment working great.
Finally, store the pitcher in a warm spot or cover it to maintain the microfoam’s freshness until you’re ready to pour or craft latte art. This little extra step makes a big difference in your final cup. Proper frothing technique with microfoam preserves the delicate texture that complements espresso-based drinks.
Common Milk Steaming Mistakes and Fixes
If you want your steamed milk to complement your espresso perfectly, you need to avoid common mistakes that can ruin texture and flavor. Here are three frequent issues and how to fix them:
- Oversteaming: Heating milk beyond 150°F scorches it, causing a burnt taste and destroying microfoam. Use a thermometer and stop steaming once you hit the ideal temperature. It’s better to be a bit cautious than to overdo it.
- Excessive Air Intake: Introducing too much air early creates large bubbles, not the smooth microfoam you want. Focus on a gentle, controlled air introduction at the start. Keep it subtle to get that creamy texture.
- Skipping Purge and Swirl: Not purging the steam wand lets bacteria or old milk contaminate fresh milk. Also, failing to swirl or tap the pitcher leaves unpopped bubbles, ruining texture. Always purge first, then swirl and tap after steaming. These small steps make a big difference!
Proper maintenance, including regular cleaning of the steam wand, is essential to prevent residue buildup and ensure consistent milk frothing quality.
Tips for Consistent Barista-Quality Steamed Milk
Mastering steamed milk goes beyond avoiding common mistakes; it requires consistent technique and attention to detail. Keep the steam wand’s position and angle steady to guarantee even heating and proper microfoam development.
Maintain a smooth whirlpool motion, which helps create a uniform, glossy microfoam full of tiny bubbles.
Use a thermometer to monitor milk temperature closely, aiming for about 140°F to get the ideal texture without scalding.
Listen carefully for a gentle tearing sound as you aerate and stretch the milk, signaling correct technique.
Finally, always wipe and purge the steam wand right after use to prevent milk buildup and maintain consistent performance.
Following these tips will help you achieve barista-quality steamed milk every time. It might take a little practice, but once you get the hang of it, you’ll notice the difference in your coffee’s texture and flavor. Just keep at it!
Additionally, pairing steamed milk with blonde espresso’s caramel undertones can enhance the overall sweetness and creaminess of your drink.
Frequently Asked Questions
Can I Steam Non-Dairy Milk With the Same Technique?
You can steam non-dairy milk using similar techniques, but you’ll need to adjust your approach. Be gentle with almond milk, and watch the temperature closely.
Expect oat or soy milk to froth more like dairy, giving you smooth microfoam. Just keep an eye on things as you go, and you’ll get great results!
How Does Altitude Affect Milk Steaming Temperature?
Like climbing Everest, you’ll find water boils sooner at altitude, so you’ll steam milk at lower temperatures to avoid scorching.
Adjust your technique to create smooth microfoam despite thinner air and shifting steam pressure.
What Type of Milk Pitcher Is Best for Steaming?
You should choose a stainless steel pitcher around 12 ounces with a thin, tapered spout for precise pouring. Make sure it has a comfortable handle and measurement markings to control volume. This helps you create smooth, consistent steamed milk every time.
It’s all about getting that perfect pour and the right amount of milk. So, pick a pitcher that feels good in your hand and makes measuring easy. That way, steaming becomes simple and enjoyable.
Can Steamed Milk Be Reheated Without Losing Texture?
You can reheat steamed milk gently by steaming it again at low temperature, but avoid microwaving.
Keep in mind, reheating often breaks down microfoam, so it’s best to enjoy your milk fresh for the best texture.
How Long Can Steamed Milk Be Stored Before Use?
You can store steamed milk in an airtight container in the fridge for up to 24 hours. But for the best texture, try to use it within 1-2 minutes.
Avoid reheating it because that breaks down the microfoam and changes the flavor. So, it’s really best fresh!
Conclusion
Now that you’ve mastered the dance of steam and milk, you’re ready to craft velvety microfoam like a true barista. Remember, every swirl and sizzle shapes your perfect cup. So stay attentive, control the temperature, and clean as you go.
With practice, your steamed milk will sing harmoniously with your espresso. This creates a latte that feels like a warm hug in a cup. Keep refining your technique, and your café-quality skills will shine every time.