To make a cappuccino with your espresso machine, start by grinding fresh espresso beans finely. Use about 14-18 grams for a double shot. Pull your shot between 20-30 seconds at 195-205°F to get a balanced flavor.
Next, steam whole or dairy-free milk to 140-150°F. Create smooth microfoam with tiny bubbles by positioning the steam wand just below the surface.
When pouring, do it gently. Layer the espresso, steamed milk, and foam for that classic texture. Master these steps, and your café-quality cappuccinos will definitely impress with expert finesse.
Essential Ingredients and Equipment for Cappuccinos
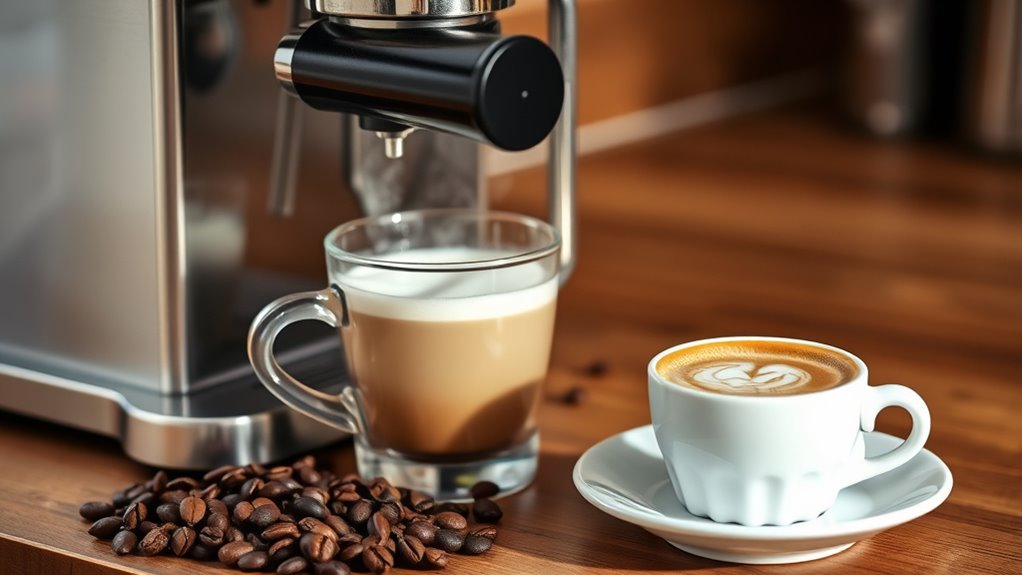
Before you pull your first shot, make sure you have fresh, high-quality espresso beans. Grind them just before brewing to capture the fullest flavor.
Select whole milk if you want creamy, rich froth. Or try dairy-free options like oat or almond milk for a lighter foam.
Your essential tools include a reliable espresso machine, a burr grinder for consistent grind size, and a milk frother or steaming pitcher to create that signature velvety texture.
Don’t overlook water quality. Use filtered water to enhance both espresso and steamed milk taste.
Finally, choose a clean, wide-rimmed cup holding 6 to 8 ounces to showcase the cappuccino’s layered beauty and maintain the perfect balance between espresso, milk, and foam.
Keep in mind that a double shot of espresso typically delivers around 126 mg of caffeine, providing the rich and concentrated base essential for a bold cappuccino flavor.
Choosing the Best Espresso Machine and Grinder for Cappuccinos

When you’re serious about crafting the perfect cappuccino, choosing the right espresso machine and grinder is vital. Look for a machine with a dedicated steam wand and strong temperature stability. Models like the Breville Barista Express or Oracle Touch fit the bill.
For the perfect cappuccino, choose an espresso machine with a dedicated steam wand and stable temperature control.
These features ensure smooth, creamy milk froth.
Opt for a burr grinder with precise grind size control, such as the Baratza Forte or Rancilio Rocky, to consistently produce uniform grounds. Flat or conical burrs improve extraction and flavor, which are essential for espresso.
Prioritize machines offering programmable shot volumes and pre-infusion to guarantee consistent espresso quality.
Finally, choose equipment that’s easy to clean and built to last, so your cappuccino game stays strong day after day.
Ensuring your espresso machine maintains a consistent extraction time is key to achieving balanced flavor and crema in every shot.
Grinding Coffee Beans for a Perfect Cappuccino Shot
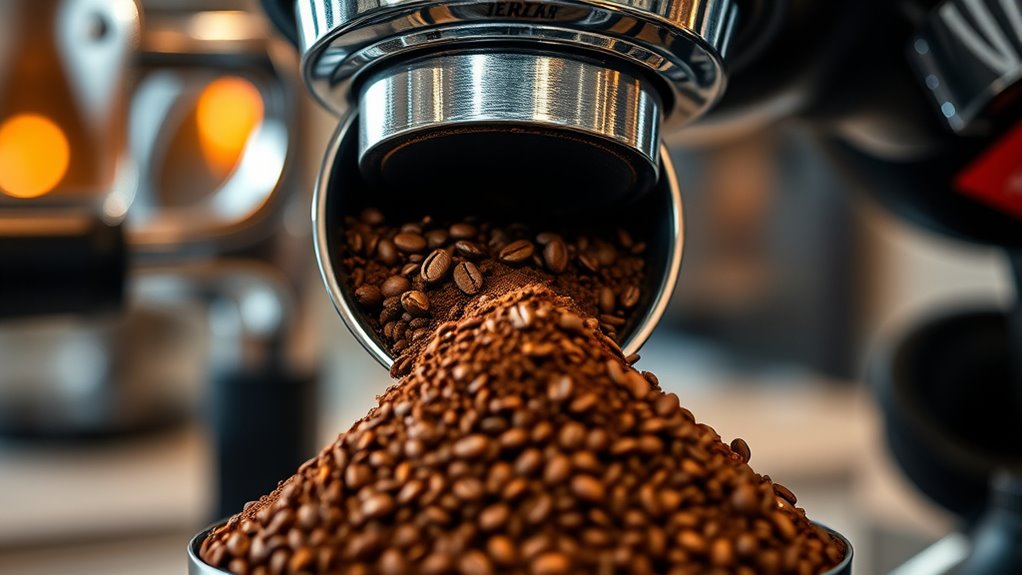
You’ll want to use a burr grinder set to a fine consistency, kind of like powdered sugar, to get the best espresso shot for your cappuccino. Grinding your beans just before brewing is key because it preserves the coffee’s freshness and aroma. And trust me, that really makes all the difference.
Also, keep an eye on the timing and grind size. Getting those just right will help ensure a smooth extraction and a rich, full flavor in every cup. Make small adjustments of about 1-2 microns when tuning your grinder to avoid overshooting and maintain grind size consistency.
Grind Size Precision
Although dialing in the perfect grind size can seem challenging, it’s essential for extracting a balanced, flavorful cappuccino shot. Use a burr grinder set to a fine grind, similar to powdered sugar, to guarantee consistent extraction.
Your goal is a steady, honey-like flow during extraction, usually around 25-30 seconds for a double shot.
If the espresso flows too quickly, adjust the grind finer. If it drips slowly or tastes weak, make it coarser.
Regularly calibrate your grinder, especially when switching coffee beans or roast levels, to maintain precision.
This attention to grind size ensures your espresso shot has the right strength and flavor. It lays the perfect foundation for your cappuccino’s creamy texture and rich taste.
Remember that grind size affects extraction time, which is crucial for achieving the ideal flavor balance in your espresso.
Freshness And Timing
Since espresso relies heavily on freshness, grinding your coffee beans just before brewing is vital to capturing the full aroma and flavor in your cappuccino shot. Use a burr grinder set to a fine grind size tailored for espresso extraction.
Measure 14-18 grams of coffee for a double shot, adjusting slightly based on your machine.
Consistency in grind size is essential. Uniform particles ensure balanced extraction and prevent bitter or sour notes caused by over or under-extraction.
Once ground, use the coffee within a minute or two to preserve the aromatic oils that give espresso its rich character.
Maintaining a fine, evenly ground coffee is key to achieving a balanced and flavorful espresso shot.
Pulling Balanced Espresso Shots for Cappuccinos
How do you guarantee every espresso shot hits the perfect balance needed for a cappuccino? Start by grinding your coffee with a burr grinder to achieve a consistent fine grind. Tamp evenly with 15-30 pounds of pressure to avoid channeling.
Make sure your machine is fully heated and pre-warmed for temperature consistency. Pull your shot within 20-30 seconds, aiming for a rich caramel crema and a volume of 30-45ml for a double shot. Maintaining the ideal brew temperature between 195°F and 205°F is crucial for extracting the best flavors.
| Step | Key Metric | Purpose |
|---|---|---|
| Grind Size | 1.5-2.0 g/ml water | Consistent extraction |
| Tamping Pressure | 15-30 lbs | Prevent channeling |
| Shot Time | 20-30 seconds | Ideal flavor and crema |
This precision guarantees your espresso forms the perfect base for a balanced cappuccino. Keep these tips in mind, and you’ll be pulling great shots every time.
Steaming and Frothing Milk to Create Silky Microfoam
To create silky microfoam, you’ll want to position the steam wand just below the milk’s surface. Introduce air carefully so you form tiny, glossy bubbles. It’s all about being gentle and precise.
Also, keep an eye on the milk temperature. Try to stay between 60-65°C (140-149°F). This helps you avoid scalding the milk and keeps the foam smooth and sweet.
Using preferred milk types can complement the flavor and texture of your microfoam perfectly.
Microfoam Techniques
When you position the steam wand just below the milk’s surface and open it, you introduce tiny air bubbles that are essential for creating silky microfoam. Once the milk warms to about 65°C (149°F), fully immerse the wand to create a vortex that evenly distributes air, yielding glossy, smooth foam.
Swirl the pitcher afterward to break down larger bubbles and refine the texture. You can use a thermometer or simply touch the pitcher’s side to avoid overheating.
Proper milk frothing is important to preserve the crema integrity on your espresso.
| Step | Action | Purpose |
|---|---|---|
| Position wand | Just below milk surface | Introduce tiny air bubbles |
| Warm milk | Heat to ~65°C (149°F) | Avoid scalding, maintain gloss |
| Submerge wand | Fully immerse for vortex | Even air incorporation |
| Swirl milk | Post-steaming swirl | Refine microfoam texture |
Milk Temperature Control
Why does controlling milk temperature matter so much when steaming for a cappuccino? Because hitting the sweet spot between 150-160°F (65-70°C) ensures your milk tastes naturally sweet and achieves that perfect microfoam texture.
You can use a thermometer or simply feel the pitcher’s side to avoid overheating.
Start with the steam wand just below the surface to introduce air, creating tiny bubbles, then submerge it fully to heat the milk evenly. Maintaining a steady vortex is key.
It blends the milk and air smoothly, resulting in glossy microfoam with uniform bubbles.
Be careful not to exceed 160°F. Overheating breaks down the foam and gives a burnt flavor.
Mastering this balance transforms your cappuccino into a silky, satisfying experience every time.
Controlling milk temperature alongside stable espresso extraction temperatures ensures the best overall flavor harmony in your drink by balancing temperature stability throughout the process.
Perfect Foam Texture for Dry and Wet Cappuccinos
Although mastering foam texture can seem challenging, understanding the key differences between dry and wet cappuccinos will help you craft the perfect cup every time.
For dry cappuccinos, you’ll want thicker, stiffer foam with fewer microbubbles. Position the steam wand just below the milk’s surface and incorporate less air.
Focus on creating a dense, meringue-like texture that holds its shape.
Wet cappuccinos require a velvety, integrated foam with a smooth texture. Submerge the wand fully and aerate gently to produce thinner, silkier foam that blends seamlessly with espresso.
Keep your milk temperature between 145°F and 150°F and control steam pressure precisely. These factors are key to developing ideal foam texture for both styles, ensuring your cappuccino looks and tastes just right.
Additionally, understanding the caffeine content in espresso can help you balance the strength and flavor profile of your cappuccino.
Pouring and Layering Milk and Foam for Classic Cappuccinos
How exactly do you achieve those iconic layers and beautiful latte art in a classic cappuccino? It all starts with mastering your pouring technique to create distinct layers of milk and foam. Hold the cup tilted slightly in your left hand to control the flow and layering.
Begin by pouring steamed milk from 2-3 inches above the espresso center, integrating smoothly. Once the cup is half full, lower the pitcher and slow your pour to form a thin foam layer on top.
Focus on these key steps: Pour steadily, adjusting height to blend milk initially, then build foam gradually. Use gentle wrist movements to pull the milk stream toward the center for layering. Finish with a spoon or pour of dense or velvety foam, depending on your preferred style.
This approach guarantees a classic cappuccino’s perfect balance and texture. Give it a try, and you’ll see how those layers come to life.
Mastering Basic Latte Art for Cappuccinos
When you master basic latte art, you turn a simple cappuccino into a visual treat that matches its rich flavor. Start by pouring steamed milk with velvety microfoam. Tiny, uniform bubbles are key for that smooth texture.
Pour the milk into the center of your espresso at a steady pace. Tilt the cup slightly and pour from a higher height to control the flow. Then lower the pitcher as you get closer to the surface to shape hearts or rosettas.
Focus on a thin, consistent stream of milk so the white foam stands out against the dark espresso. Practice smooth wrist movements and keep your pour steady.
With a bit of patience and precision, your cappuccinos won’t just taste amazing — they’ll look professionally crafted every time.
Adjusting Coffee and Milk for Your Ideal Cappuccino Flavor
Since every palate is unique, tweaking your coffee and milk proportions lets you craft a cappuccino that perfectly suits your taste. Start with freshly ground medium to dark roast coffee, ground fine for espresso.
Then, balance your espresso shot volume, usually a 25-30 ml double shot, to complement the milk’s richness.
Froth whole milk or rich dairy alternatives to create creamy microfoam. Adjust the foam quantity to match your preferred style, whether dry or wet.
Consider these key adjustments:
- Experiment with milk temperature between 60-65°C (140-149°F) to enhance sweetness without scalding.
- Balance the classic one-third ratio of espresso, steamed milk, and foam for texture and flavor.
- Modify foam density and volume to shift your cappuccino’s mouthfeel.
Troubleshooting Common Cappuccino-Making Mistakes
If your cappuccino isn’t tasting quite right or the texture feels a bit off, it’s probably because of some common mistakes with the espresso or milk frothing.
Take a moment to check how long you’re extracting your espresso and make sure your milk is at the right temperature before you start frothing.
Just a few small tweaks can really fix those flavor imbalances and help you get that smooth, velvety foam every single time.
Common Espresso Errors
Although mastering the perfect cappuccino takes practice, avoiding common espresso errors can really boost your results. These errors usually come from extraction problems or mishandling your ingredients. You want a balanced shot and smooth crema to go perfectly with your milk.
Watch out for these critical mistakes:
Over-extracting espresso creates bitterness and a thin crema, which hurts the flavor and texture.
Inconsistent tamping pressure causes uneven extraction, leading to weak or sour shots.
Using stale beans or the wrong grind size results in dull flavors and an unbalanced cappuccino.
Milk Frothing Issues
When frothing milk, getting the texture just right takes attention to technique and detail. Avoid over-steaming, as it creates large bubbles that ruin your cappuccino’s smooth microfoam. Likewise, using milk that’s too cold or steaming it briefly results in weak foam that won’t integrate well with espresso.
Always purge the steam wand first to prevent water from thinning your milk. Position the wand just below the surface. Too deep stifles foam, too shallow creates big bubbles.
After steaming, swirl and tap the pitcher to break up any large bubbles. This ensures consistent, velvety foam.
Master these steps, and you’ll troubleshoot common milk frothing issues, making each cappuccino creamy, balanced, and café-quality every time.
Frequently Asked Questions
Can I Use Non-Dairy Milk for Making Cappuccinos?
Yes, you can use non-dairy milk for cappuccinos. Opt for barista-formulated oat or soy milk to get better froth and creaminess. These versions are designed to steam and foam more like regular milk, which makes a big difference.
Just keep in mind that you might need to adjust your steaming techniques. Foam stability can vary quite a bit depending on the non-dairy milk you choose. So, it might take a little practice to get it just right.
How Long Should I Clean My Espresso Machine After Making Cappuccinos?
You should clean your espresso machine immediately after making cappuccinos. Wipe and purge the steam wand to prevent buildup. This helps keep your machine in good shape.
Spend about 5-10 minutes daily on cleaning. Plus, do a weekly backflushing and monthly descaling. This routine keeps your machine performing at its best and ensures great taste every time.
What Is the Best Water Temperature for Brewing Espresso?
Think of brewing espresso like a dance. It needs the right temperature to shine. You want water between 195°F and 205°F to extract rich flavors perfectly.
This helps you avoid bitterness or weakness in your coffee’s taste. Getting the temperature right is key to a great cup every time.
How Do Altitude Changes Affect Espresso Extraction?
Altitude changes affect espresso extraction by lowering water boiling points, which can cause the extraction to happen faster or result in a weaker shot.
Because of this, you’ll need to adjust your grind size, temperature, and pressure settings to find the right balance of flavor.
It’s all about avoiding over-extraction or under-extraction so your espresso tastes just right.
Can I Make Cappuccino Without an Espresso Machine?
You can absolutely make a cappuccino without an espresso machine. Just brew strong coffee using a French press or Moka pot. Then, froth milk with a whisk or frother.
It won’t be traditional, but it’ll still taste great. Give it a try—you might be surprised how good it turns out!
Conclusion
Mastering cappuccino-making elevates your coffee experience. Did you know over 50% of espresso drinkers prefer a perfectly balanced cappuccino? With the right equipment, freshly ground beans, and silky microfoam, you’re set to craft café-quality drinks at home.
Keep practicing your pouring and frothing techniques to personalize flavor and texture. Remember, small adjustments make a big difference. They turn every cup into a delightful, creamy masterpiece that satisfies both your taste and your coffee passion.